If you have ever tried to convert a landscape photo to portrait without losing quality, you already know the frustration. You rotate or crop, and suddenly faces get sliced off, the background looks cramped, and the image turns blurry. It does not have to be this way. Whether you need a portrait-oriented image for Instagram, a professional headshot, a Pinterest pin, or a physical print, there are reliable methods that preserve sharpness, composition, and detail from start to finish.
Table of Contents
- Understanding the Core Challenge: Why Landscape-to-Portrait Conversion Is Harder Than It Looks
- How to Convert a Landscape Photo to Portrait Without Losing Quality: Three Proven Methods
- Method 1: Smart Cropping for Clean Portrait Framing
- Method 2: Extending the Image Canvas Vertically
- Method 3: Resizing With Intelligent Aspect Ratio Control
- Choosing the Right Portrait Aspect Ratio for Your Purpose
- Step-by-Step Workflow: Converting a Landscape Photo to Portrait Online
- How to Convert Landscape Photos to Portrait for Specific Use Cases
- Portrait Conversion for Social Media Profiles and Posts
- Portrait Conversion for Printing
- Portrait Conversion for Professional Documents and ID Photos
- Common Mistakes to Avoid When Converting Landscape to Portrait
- Image Quality Preservation Tips That Actually Matter
The core problem is straightforward: a landscape image is wider than it is tall, while a portrait image is taller than it is wide. When you force one shape into the other, something must change. The secret to doing this well lies in controlling what changes—and making sure resolution never takes the hit. This guide walks through every practical technique, step by step, so you can convert a landscape photo to portrait without losing quality regardless of your skill level or budget.
Everything here is written for real people with real photos. No design theory waffle. No mandatory software downloads. Just clear steps, smart choices, and free browser-based tools that do the job properly.
Understanding the Core Challenge: Why Landscape-to-Portrait Conversion Is Harder Than It Looks
A standard landscape photograph might measure 6000 × 4000 pixels. A portrait version of the same image needs to be taller than it is wide—say 4000 × 6000 pixels. That is a dramatic shift in geometry. You cannot simply rotate the image ninety degrees because the content would appear sideways. And you cannot just drag the edges to reshape it, because that stretches every pixel and distorts faces, text, and architectural lines.
From my experience editing thousands of photographs for both web and print, the most common problems people encounter include:
- Important subjects getting cropped out entirely
- Faces ending up uncomfortably close to the frame edge
- Blurry or pixelated results from aggressive resizing
- Awkward empty space above or below the subject
- Repeated exports compounding compression artefacts
Understanding these risks upfront makes it far easier to choose the right conversion method and avoid quality loss.
Takeaway: The challenge is not the conversion itself—it is deciding what changes while keeping the photo looking intentional and sharp.
How to Convert a Landscape Photo to Portrait Without Losing Quality: Three Proven Methods
There is no single best method for every scenario. The right approach depends on the photo’s composition, the subject’s position within the frame, and where the final image will be used. Below are the three most reliable techniques for converting a landscape photo to portrait without losing quality, ranked from simplest to most advanced.
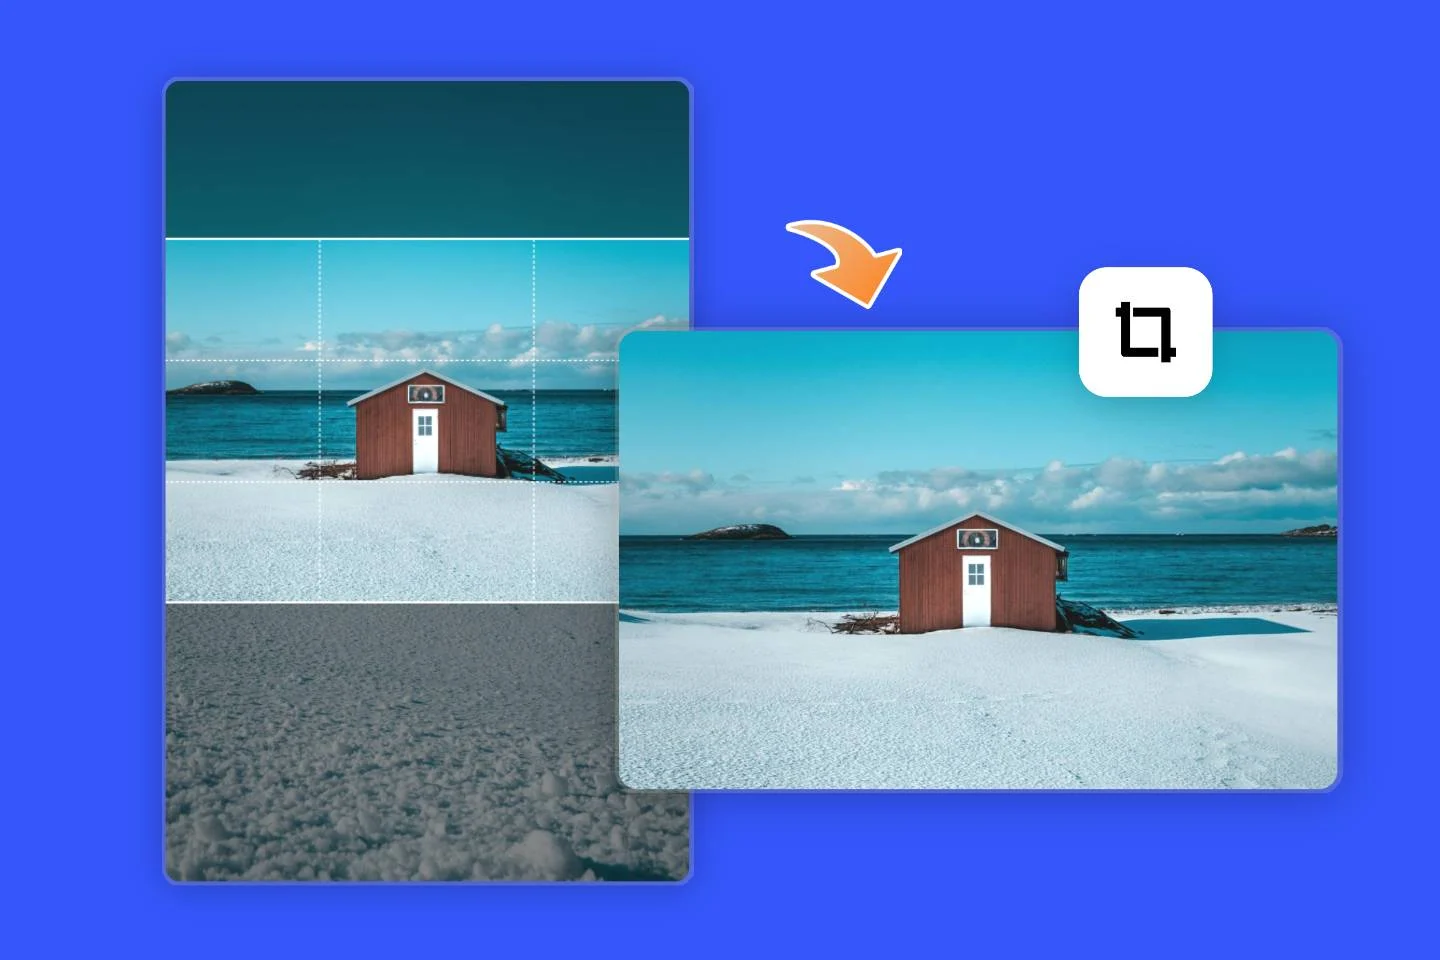
Method 1: Smart Cropping for Clean Portrait Framing
Cropping is the most straightforward way to convert a landscape photo to portrait orientation while keeping image quality completely intact. Because cropping only removes pixels from the edges rather than altering existing ones, your resolution within the remaining frame stays identical to the original.
This method works best when:
- The main subject is near the centre of the frame
- There is generous background space on the left and right sides
- You are preparing images for social media, web use, or digital profiles
The key is controlled cropping—choosing an exact portrait ratio such as 4:5 or 2:3 and positioning the crop window deliberately rather than guessing. Using a free online crop tool like the image cropper on EveryImage.com lets you select a precise portrait ratio while previewing the result in real time. Because the tool processes images directly in your browser, original image quality stays untouched and no file is stored on a remote server.
Takeaway: Smart cropping is the safest, fastest way to convert landscape to portrait because it never alters or resamples existing pixels.
Method 2: Extending the Image Canvas Vertically
Sometimes cropping simply is not an option. If the subject already fills most of the frame—a group photo, a wide architectural shot, or a product image with tight margins—cropping would remove critical details. In that case, extending the canvas vertically produces a portrait-shaped image without sacrificing any of the original content.
This technique adds space to the top and bottom of the image. The extra space can be filled with:
- A blurred version of the existing background (creates a natural, editorial look)
- A solid colour sampled directly from the photo’s dominant tones
- A subtle gradient that blends seamlessly into the image edges
- AI-generated content that extends the scene (available in tools like Adobe Photoshop’s Generative Fill)
Canvas extension is ideal for Instagram portrait posts, Pinterest pins, and profile photos where you need vertical real estate without losing any part of the original image. You can prepare the image by using an online image resizer to set a portrait canvas, then adjusting the background fill so it looks intentional rather than accidental.
Takeaway: When the subject fills the frame and cropping would cut essential details, extending the canvas vertically preserves everything while achieving portrait orientation.
Method 3: Resizing With Intelligent Aspect Ratio Control
Simply resizing a landscape image into a portrait shape without preserving proportions will stretch the photo. Faces look distorted. Buildings bend. Text warps. This is the fastest way to ruin an image permanently.
Instead, always lock the aspect ratio during resizing. The correct approach is to resize the image so it fits within a portrait frame, then fill the remaining space with a background colour or pattern. This combination—proportional resizing plus padding—delivers a portrait-oriented result without any distortion.
On EveryImage.com, the resizing tools preserve original proportions automatically while allowing you to fit the image into a portrait frame safely. This ensures pixel clarity remains intact and avoids the stretching that destroys photographs.
Takeaway: Never force a landscape photo into portrait dimensions by stretching—always lock the aspect ratio and use padding or background fill for the remaining space.
Choosing the Right Portrait Aspect Ratio for Your Purpose
“Portrait” does not mean one fixed size. The destination platform or print format determines which ratio you should use. Choosing the wrong ratio means your image will be cropped again—often unpredictably—by the platform itself.
| Aspect Ratio | Pixel Example | Best Use Cases | Platform Examples |
|---|---|---|---|
| 4:5 | 1080 × 1350 | Social media feed posts, Facebook ads | Instagram, Facebook, LinkedIn |
| 2:3 | 4000 × 6000 | Photography prints, standard portraits | 4×6 prints, stock photo sites |
| 9:16 | 1080 × 1920 | Stories, Reels, short video thumbnails | Instagram Stories, TikTok, YouTube Shorts |
| 3:4 | 3000 × 4000 | Tablet displays, presentation slides | iPad, Google Slides, Keynote |
| 1:1.414 (A4) | 2480 × 3508 | Documents, CVs, ID photos | Print at 300 DPI for A4 paper |
Before converting, decide where the image will live. That single decision shapes every other step in the process and prevents you from having to redo the work later.
Takeaway: Always select a specific portrait aspect ratio based on the final platform before you begin any cropping or resizing.
Step-by-Step Workflow: Converting a Landscape Photo to Portrait Online
This workflow is built from real-world use cases and works reliably whether you are using EveryImage.com or any capable image editor. Follow these steps in order for the cleanest results when you need to convert a landscape photo to portrait without losing quality.
- Start with the highest resolution original. Upload your landscape photo in its original format—JPEG, PNG, TIFF, or WebP. Avoid screenshots or images that have already been compressed multiple times, as each compression cycle degrades sharpness.
- Select your target portrait ratio. Based on the table above, choose the exact ratio that matches your final use case. Do not guess. Social platforms enforce strict sizing, and choosing incorrectly means the platform will auto-crop your image unpredictably.
- Adjust framing with intention. Centre the subject naturally within the portrait crop window. Leave breathing room above the head. Avoid placing eyes or faces directly on the edge of the frame. In compositional terms, the subject’s eyes should sit roughly along the upper third line.
- Preview at full size before exporting. Zoom to 100% and check sharpness around key details—eyes, text, product labels, or architectural edges. If anything looks soft or fuzzy, undo your adjustments and try a less aggressive crop.
- Export once at maximum quality. Always export at original quality or the highest available setting. Lossy compression compounds mistakes, and every additional export cycle removes data permanently. EveryImage.com tools automatically preserve quality during export and securely delete files after processing.
Takeaway: The five-step workflow—original file, correct ratio, careful framing, full-size preview, single high-quality export—prevents the most common causes of quality loss during landscape-to-portrait conversion.
How to Convert Landscape Photos to Portrait for Specific Use Cases
Portrait Conversion for Social Media Profiles and Posts
Profile images demand visual balance. Faces should sit slightly above centre with enough surrounding space to feel comfortable rather than claustrophobic. Cropping too tightly makes an image feel aggressive; cropping too loosely makes the face disappear, especially inside circular profile frames on platforms like Instagram and LinkedIn.
After converting to portrait, use a square preview overlay to double-check that nothing important gets clipped when the platform applies its own circular mask. The 4:5 ratio is the maximum portrait size Instagram displays in the feed, making it the most impactful choice for engagement—posts in this ratio take up more vertical screen space, which research from Later and Hootsuite has consistently shown drives higher interaction rates.
For a quick conversion workflow, try the image converter on EveryImage.com, which lets you change format, dimensions, and orientation in a single step.
Takeaway: For social media, use a 4:5 portrait ratio and always preview inside a circular mask to catch accidental clipping before publishing.
Portrait Conversion for Printing
Printing is unforgiving. If resolution drops below approximately 300 pixels per inch (PPI) at the target print size, softness and pixelation become visible to the naked eye. This means a 4×6 inch print requires at least 1200 × 1800 pixels, while an 8×12 inch print needs a minimum of 2400 × 3600 pixels.
When converting a landscape photo to portrait for print, always:
- Start with the highest resolution original file available
- Use a 2:3 portrait ratio for standard photographic prints
- Avoid heavy background blur or AI-generated extensions in the visible print area
- Export as TIFF or maximum-quality JPEG to minimise compression artefacts
According to Adobe’s official photography guidelines, maintaining native resolution during cropping is essential for print clarity—resampling (adding pixels through interpolation) always produces softer results than working with existing pixel data.
Takeaway: For print, ensure the cropped portrait image maintains at least 300 PPI at the target print size, and always export in a lossless or minimal-compression format.
Portrait Conversion for Professional Documents and ID Photos
CVs, ID photographs, corporate headshots, and company profiles require clean edges, neutral backgrounds, and predictable framing. Avoid artistic backgrounds and extreme crops. Keep shoulders visible and posture upright within the frame. Most official ID photo standards follow ratios close to 2:3 or 35mm × 45mm, which translates to roughly 7:9.
A controlled crop using an online image cropper gives predictable, repeatable results without introducing compression artefacts—especially important when the same headshot will be used across multiple documents and platforms simultaneously.
Takeaway: For professional documents, use a conservative 2:3 or 7:9 crop with clean backgrounds and visible shoulders for the most universally accepted result.
Common Mistakes to Avoid When Converting Landscape to Portrait
Even experienced editors make these errors. Being aware of them before you start saves time and protects image quality:
- Stretching the image to fit. This permanently and irreversibly distorts proportions. There is no undo once you save and close.
- Over-cropping the subject. Faces need space to breathe. Cropping too close to the forehead or chin creates an uncomfortable, passport-booth look.
- Ignoring final platform requirements. A portrait image for Instagram (4:5 at 1080 × 1350) is not the same as a portrait for a 4×6 print (2:3 at 1200 × 1800 minimum). Always check specifications first.
- Exporting multiple times. Each JPEG export applies lossy compression. If you edit, export, re-open, edit again, and re-export, quality degrades with every cycle. Export once, at the end, at maximum quality.
- Using untrusted online tools. Some free tools silently add watermarks, reduce resolution, or retain your uploaded files indefinitely. Always verify a tool’s privacy policy before uploading personal or sensitive photographs.
Takeaway: The biggest quality killers are stretching, over-cropping, and repeated exports—avoid all three and your conversions will stay sharp.
Image Quality Preservation Tips That Actually Matter
These four principles apply universally, regardless of which tool or technique you use to convert a landscape photo to portrait without losing quality:
- Always work from the original file. If you only have a compressed copy, your ceiling for quality is already lower. Track down the camera original or the highest-resolution version available.
- Avoid repeated edits on lossy formats. If you need to make multiple adjustments, work in a lossless format (PNG or TIFF) and convert to JPEG only for the final export.
- Use lossless formats when the destination supports them. PNG and WebP (lossless mode) retain every pixel exactly as it exists in the original. JPEG, by design, discards data every time it compresses—even at “100% quality” settings, there is minor information loss.
- <strong